

While we’ve made a lot of progress in the last few years, there are still many scrolls in which nobody has seen a single letter.
The Vesuvius Challenge is offering $50,000 per scroll to the first person or team that uncovers at least 10 visible and legible letters within a single 4 cm² area in one of the eligible volumes (the full rules are on our prizes page).
This article describes one good way to get started.. It is not the only way to win. You can replace any stage with your own segmentation or ink-detection method. Think of this as the route our team might try first:
choose an eligible scroll → inspect it in VC3D → recover a papyrus surface → flatten and render a surface volume → run ink detection → inspect, iterate, and search
1. Pick a scroll and open it in VC3D
Start with one of the volumes in the eligible-scroll list.
Install VC3D, our application for exploring CT scans and virtually unwrapping papyrus. Downloads for Windows, Mac and Linux are available on our releases page and full instructions are in the unwrapping tutorial.
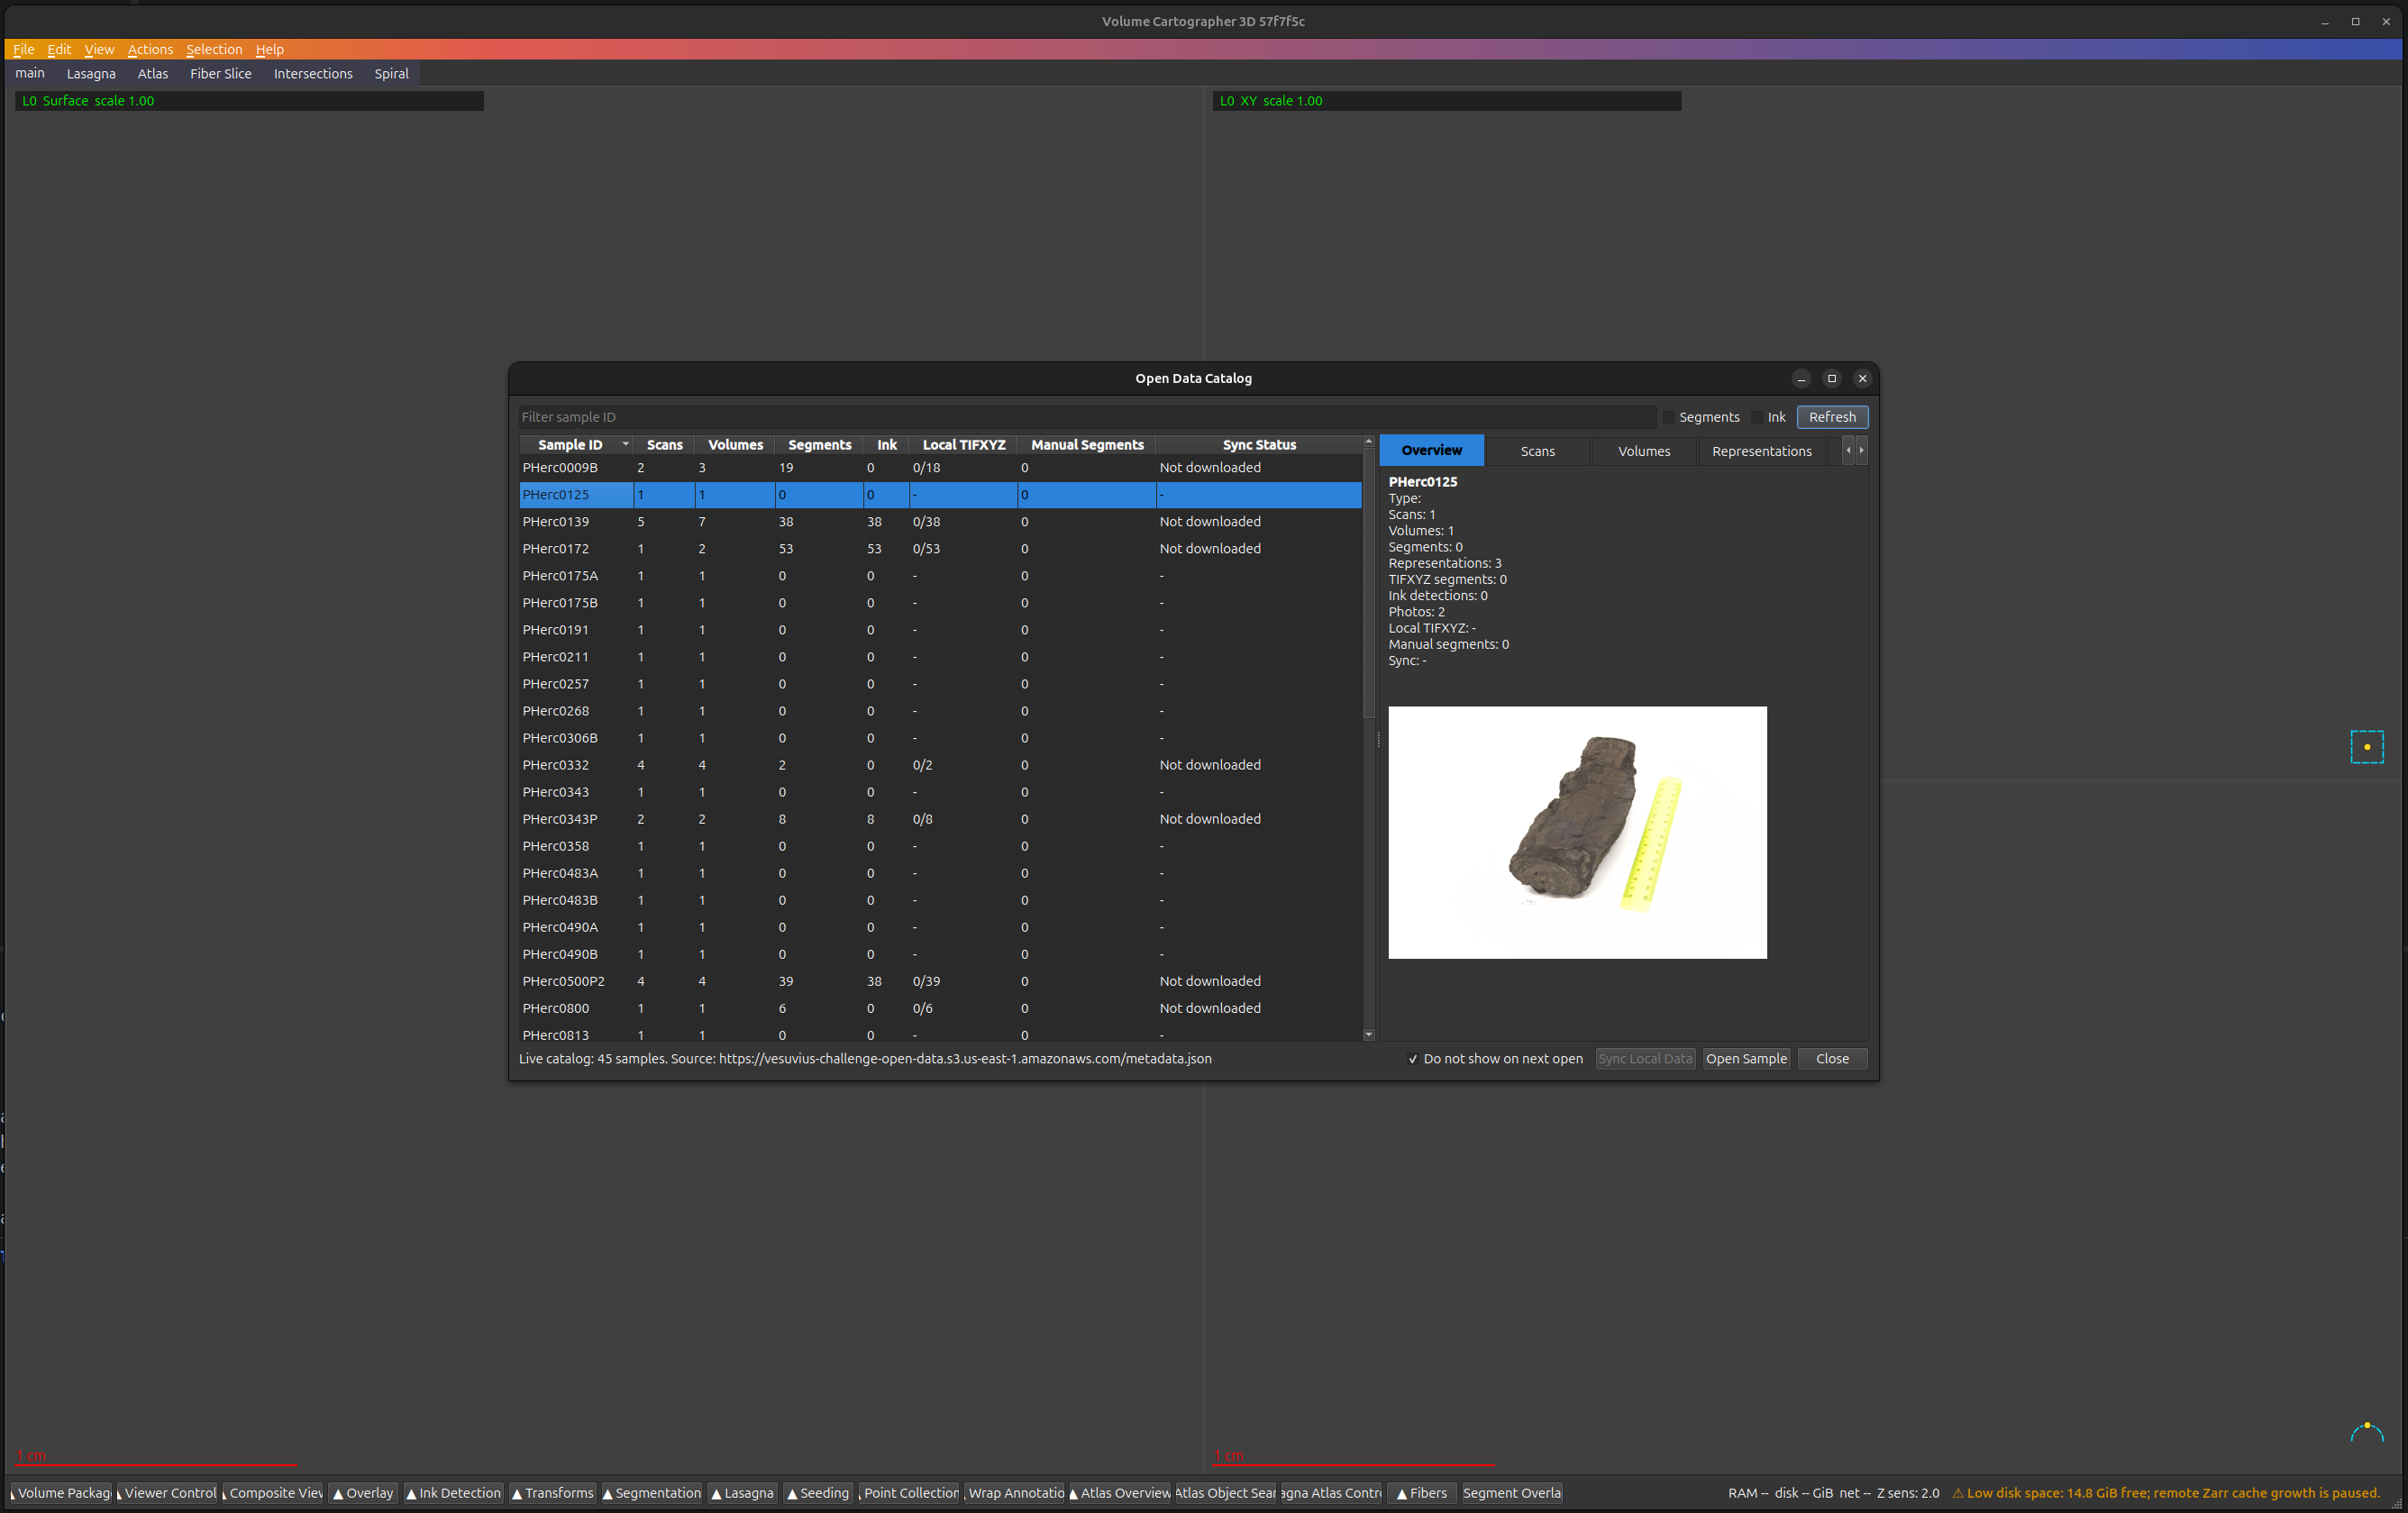
When VC3D starts, choose File → Open Data Catalog…, select your scroll, and click Open Sample. VC3D streams the data it needs from the Vesuvius Challenge open-data collection.
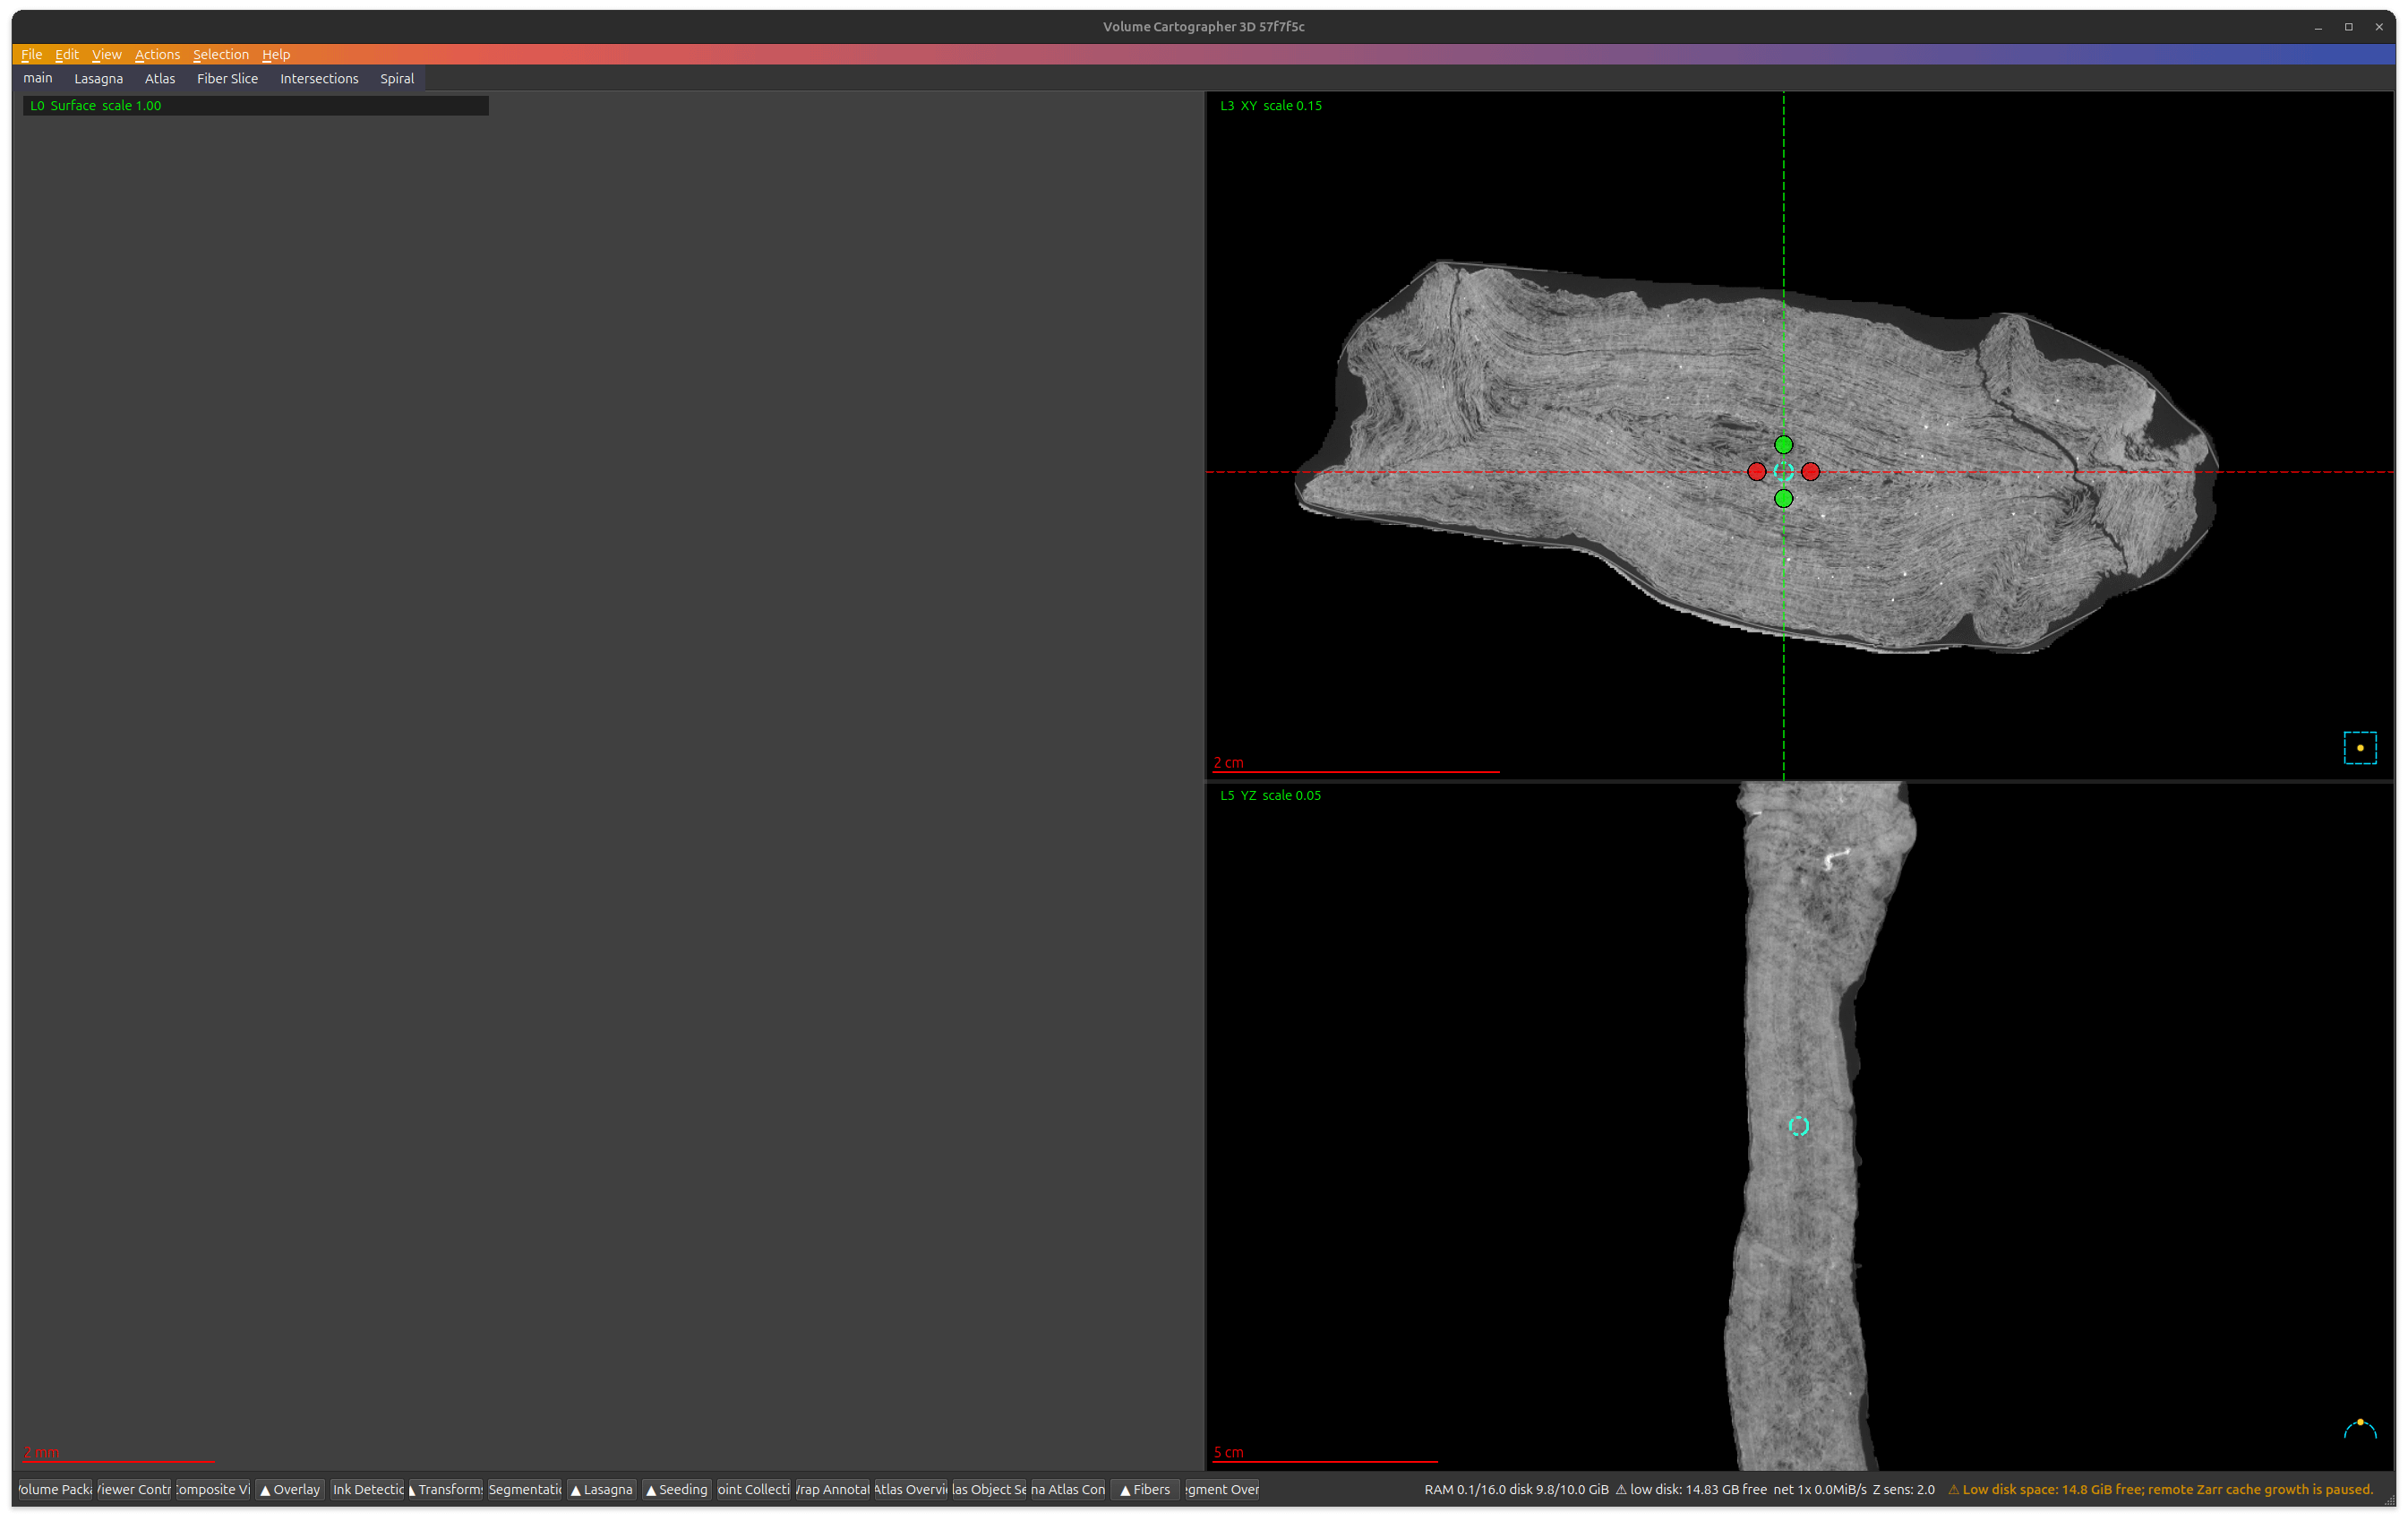
You will see several synchronized views of the same 3D scan. The two cross-section views on the right let you slice through the scan while the large flat view on the left is where a flattened surface appears (once you have one). Use the mouse wheel to zoom, right-drag to pan, and Ctrl-click or R to move the shared focus point. Holding Shift while scrolling moves through slices.
2. Recover a surface
Ink cannot be read in the original CT volume -- the papyrus sheet is wound up tightly, turning even visible ink into an unreadable “word soup” . First we need to find a geometric description of the written surface of a sheet. For this tutorial, we’re focusing on the spiral fitter, since this is currently our most powerful method.
The spiral fitter aims to build one globally coherent surface that spans the scroll’s windings. It begins with an ideal rolled sheet and deforms it until it agrees with evidence extracted from the scan. This can bridge gaps that stop local patch-growing methods and can produce much more searchable area in one run -- so a better chance of finding ink than looking at smaller patches.
The fitter accepts many kinds of evidence, but you do not need all of them. For the initial route described here, we’ll use only:
an umbilicus, a list of the X/Y coordinates of the scroll’s center at different Z positions;
tracks, curves extracted from the surface predictions; and
the two surface-normal volumes, which tell the fit how local sheets are oriented.
Ready-made tracks for multiple scrolls are available here. The Lasagna predictions, including the normal volumes, are available in the main open-data bucket -- for example, the PHerc. 191 Lasagna predictions. The canonical CT volumes and other public data are described on the open-data page.
You will also need an umbilicus for your chosen scroll. As an example of the format, see PHerc. Paris 4’s umbilicus.json. It records the X/Y position of the scroll center at a series of Z coordinates, defining how the centerline moves through the scan.
To run fit_spiral.py on tracks and normals only, arrange the relevant files like this:
my_spiral_dataset/
├── spiral-scroll.json
├── umbilicus.json
├── tracks/
│   └── 2um_ds2_ps256_surf_v2.dbm
└── lasagna_inputs/
    ├── las_008_nx.ome.zarr
    └── las_008_ny.ome.zarr
spiral-scroll.json records additional metadata about the scroll:
{
  “schema_version”: 1,
  “name”: “PHercXXXX”,
  “voxel_size_um”: 9.362,
  “spiral_outward_sense”: “CW”,
  “normal_zarr_group”: “2”,
  “lasagna_scale”: 2
}
The values for normal_zarr_group and lasagna_scale here are suitable for the 8/9um prize volumes. The voxel size should match your chosen volume; the winding direction can be determined by manually inspecting some slices of the scroll in VC3D, and looking at which direction it wraps.
From villa/volume-cartographer/scripts/spiral, launch a small Z-range first (i.e. fitting only a part of the full scroll height), and tell the script to use only the available inputs:
export FIT_SPIRAL_CONFIG_OVERRIDES=’{
  “z_begin”: 10000,
  “z_end”: 11000,
  “input_disable_patches”: true,
  “loss_weight_shell_outer”: 0,
  “loss_weight_shell_patch_radius”: 0,
  “dense_spacing_mode”: “grad_mag”,
  “loss_weight_dense_spacing”: 0
}’
export FIT_SPIRAL_OUT_DIR=/path/to/spiral-output
python fit_spiral.py --dataset /path/to/my_spiral_dataset
These overrides turn off patch and outer-shell losses and disable spacing guidance that would otherwise require additional data. The remaining geometric evidence is the umbilicus, tracks, and X/Y normal volumes, plus the fitter’s smoothness regularization. Change z_begin and z_end to a useful region of your scroll. A roughly 1,000-slice band is a sensible first experiment before committing time and GPU memory to a larger range.
The output contains checkpoints, diagnostic overlays, satisfaction metrics, and one tifxyz mesh per fitted winding. Load the meshes back into VC3D and inspect them in cross-section -- choose File > Attach Segments and select the folder with the output meshes (e.g. /path/to/spiral-output/2026-08-17_PHercXXXX_baseline/meshes/fitted_baseline). A good surface stays on one papyrus sheet instead of jumping to its neighbor. In the flat view, continuous horizontal and vertical papyrus fibers are a strong sign that the geometry is following the sheet correctly.


Spiral fitting is powerful, but it is a global optimization over a badly crushed object. It may fail in a difficult region. Inspect the geometry before trusting the ink result (see the images above). In areas with strong local distortions the ink models can become confused and produce things that look very letter-like.
Fallback: make a smaller local patch. Patches cover much less of the scroll, but can be more robust because each one only has to follow a nearby piece of papyrus. You can create a local patch in VC3D by holding Ctrl and right-clicking in the volume where you want to start the patch, then choosing Create Segment (GrowPatch). Our unwrapping tutorial walks you through the process.
3. Flatten the geometry and render a surface volume
Whether your geometry came from a spiral winding or another method, the next step is the same: flatten it and sample the original CT scan around it.
This produces a surface volume, also called a layer stack. At every location on the flattened sheet, the renderer samples the CT intensity on the surface and at a series of small offsets above and below it along the surface normal. Instead of searching through a teravoxel rolled scroll, you now have a compact, flat 3D stack centered on the papyrus:
----   layer above the sheet   ----
----   layer above the sheet   ----
---- estimated papyrus surface ----
----   layer below the sheet   ----
----   layer below the sheet   ----
The extra depth matters. The segmentation may sit slightly to one side of the true written face, and ink cues can occur on or just above the papyrus. Sampling a slab gives both a human and an ink model several nearby views. Save the result to disk as Zarr so it is ready for inference.
Optional (but recommended!): Flatten each segment with Lasagna
This step is optional, but will greatly improve the appearance of any potential ink. ‘Flattening’ here refers to removing distortion in the unrolled surface. It doesn’t change the 3D shape of the surface, but moves points around in 2D on the sheet to make it look more like the original.
To do this, use the Lasagna flattener on each segment you want to search for ink. A segment can be one winding emitted by the spiral fit or a smaller patch made with another segmentation method. Create a small input file such as /absolute/path/to/segment_flatten_input.json, pointing it at that segment’s tifxyz directory:
{
  “external_surfaces”: [
    { “path”: “/absolute/path/to/segment” }
  ]
}
Then run the flatten configuration from villa/lasagna:
cd villa/lasagna
python fit.py \
  configs/flatten_fast_nofilter.json \
  /absolute/path/to/segment_flatten_input.json \
  --out-dir /path/to/segment-flatten-run \
  --device cuda
The flattened segment is written to /path/to/segment-flatten-run/tifxyz/flatten.tifxyz. Give every segment its own output directory so that the results remain separate and traceable. The JSON file and its external_surfaces path should both be absolute. Follow the Lasagna setup instructions before running this GPU-based step.
Render a surface volume
Now render the original CT intensities around that flattened segment (either directly from the spiral, or after the lasagna flattener) to create its surface volume:
vc_render_tifxyz \
  --volume /path/to/eligible-scroll.ome.zarr \
  --group-idx 0 \
  --scale 1 \
  --segmentation /path/to/segment-flatten-run/tifxyz/flatten.tifxyz \
  --num-slices 28 \
  --slice-step 1 \
  --cache-gb 16 \
  --zarr-output /path/to/rendered-segment/segment.zarr
The parameters given here are suitable for using with our released 9um ink models; however if you train your own models, you may want to vary them. The ink-detection tutorial explains the expected segment layout and how the model consumes this stack.
Before running ink detection models it is good practice to look through the layers and at maximum-intensity composites. In some scrolls the ink is directly visible as a bright signal or a characteristic raised, cracked texture. If you can already show 10 genuine, legible letters meeting the prize criteria, a machine-learning model is not required.


4. Run ink inference on the rendered 9 µm data
Unfortunately, the carbon ink and carbonized papyrus typically have almost the same X-ray density, so the ink signal is too subtle to read directly. That is where our ink-detection pipeline comes in. It takes a small 3D crop from the surface volume and predicts an ink probability for each location on the flat sheet.
The simplest way to start is with one of our pretrained cross-scroll 9 µm models. From your existing Villa checkout, install the relevant environment and confirm that PyTorch can see your GPU:
cd villa/vesuvius
uv sync --extra models
uv run --extra models python -c \
  “import torch; print(torch.__version__, ‘| cuda:’, torch.cuda.is_available())”
Download one released checkpoint from scrollprize/ink_9um:
uvx --from huggingface_hub hf download scrollprize/ink_9um \
  hybrid_3d2d-seed42/step-075000.pth \
  --local-dir checkpoints/ink_9um
The checkpoint contains the model architecture and training configuration, so you do not need to recreate either for inference. Run it on your rendered surface volume like this:
uv run --extra models python -m vesuvius.ink_detection.inference.infer \
  /path/to/rendered-segment/segment.zarr \
  checkpoints/ink_9um/hybrid_3d2d-seed42/step-075000.pth \
  predictions/segment.tif \
  --overlap 0.5 \
  --blend-mode hann \
  --batch-size 4 \
  --direction both
--direction both runs the model in both possible surface-normal directions, which is useful when you do not yet know which side of your segment faces the written surface. It writes segment.tif and segment_reverse.tif; in both images, brighter pixels mean higher predicted probability of ink. If you run out of GPU memory, reduce --batch-size to 1. For more checkpoints, depth-window experiments, and training instructions, see the full ink-detection tutorial.
5. Inspect, label, retrain, repeat
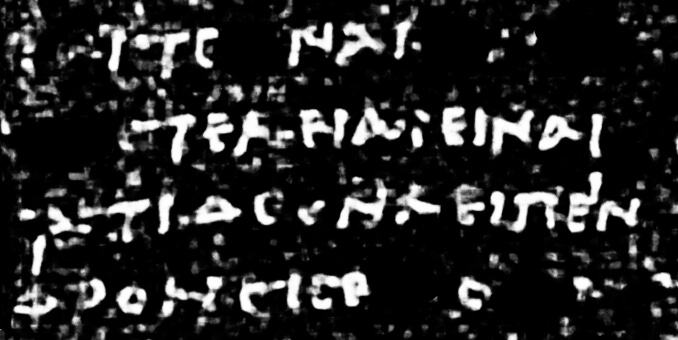
You might see characters on the first inference pass. You might see only fragments of strokes. You might see nothing at all.
If the prediction reveals a small amount of convincing ink (but not enough to be eligible for a prize), use it as a foothold to train your own model (or fine-tune ours). The iterative-labeling workflow is:
Run inference on one or more segments.
Conservatively label only strokes that are clearly and repeatably supported by the data.
Expand the supervision mask to include both those strokes and trustworthy background around them.
Retrain or fine-tune the model.
Test on held-out regions and repeat.
This loop may gradually turn weak fragments into readable characters. It may also be unnecessary if you are lucky and the released model transfers well.
Be strict about false positives. Ink models recover local signal; they should not invent plausible writing. Keep the model’s receptive field small, never train on the region you intend to claim as a discovery, and verify that candidate text forms coherent rows aligned with the papyrus fibers. The First Letters submission criteria explain the evidence and validation the review teams expect.
If you find nothing
“No letters here” can mean several different things, for example:
this area genuinely contains no surviving ink;
the chosen model does not transfer to this scroll; or
the segmentation jumps between neighboring layers or drifts away from the papyrus.
Return to VC3D and inspect the segmentation in cross-section. Does the orange mesh trace stay on the same physical sheet? Are the fibers continuous in the flattened view? Search farther above and below the surface, try a different winding or patch, and try another region of the scroll. If necessary, move to another eligible scroll.
Good luck!
We hope this post inspires you to search for some ink and potentially win a $50,000 First Letters Prize! If you have any questions, just ask on our Discord.